Meetings
About meetings
Meetings are where people come together to discuss or inform about a given topic. All the meetings have a given location - where the meeting happens, which could be online - and start and end date/time.
Types of meetings
Regarding the location, depending on the configuration of the meetings component, you can have:
In-person meetings: where you get together in a given physical location.
Online meetings: where you get together using an external service - for instance Zoom or Jitsi Meet - the event allows attendees to access the meeting in the minutes before it starts and throughout the meeting via the event page.
Hybrid meetings: where there is an online meeting which is also streamed online.
Subscribing to calendars
If you wish to receive notification of all meetings relating to an entity in the Community Portal, whether that’s an Assembly or a Process, click the meetings tab and then Export Calendar. This provides you with a link to add the calendar in your tool of choice.
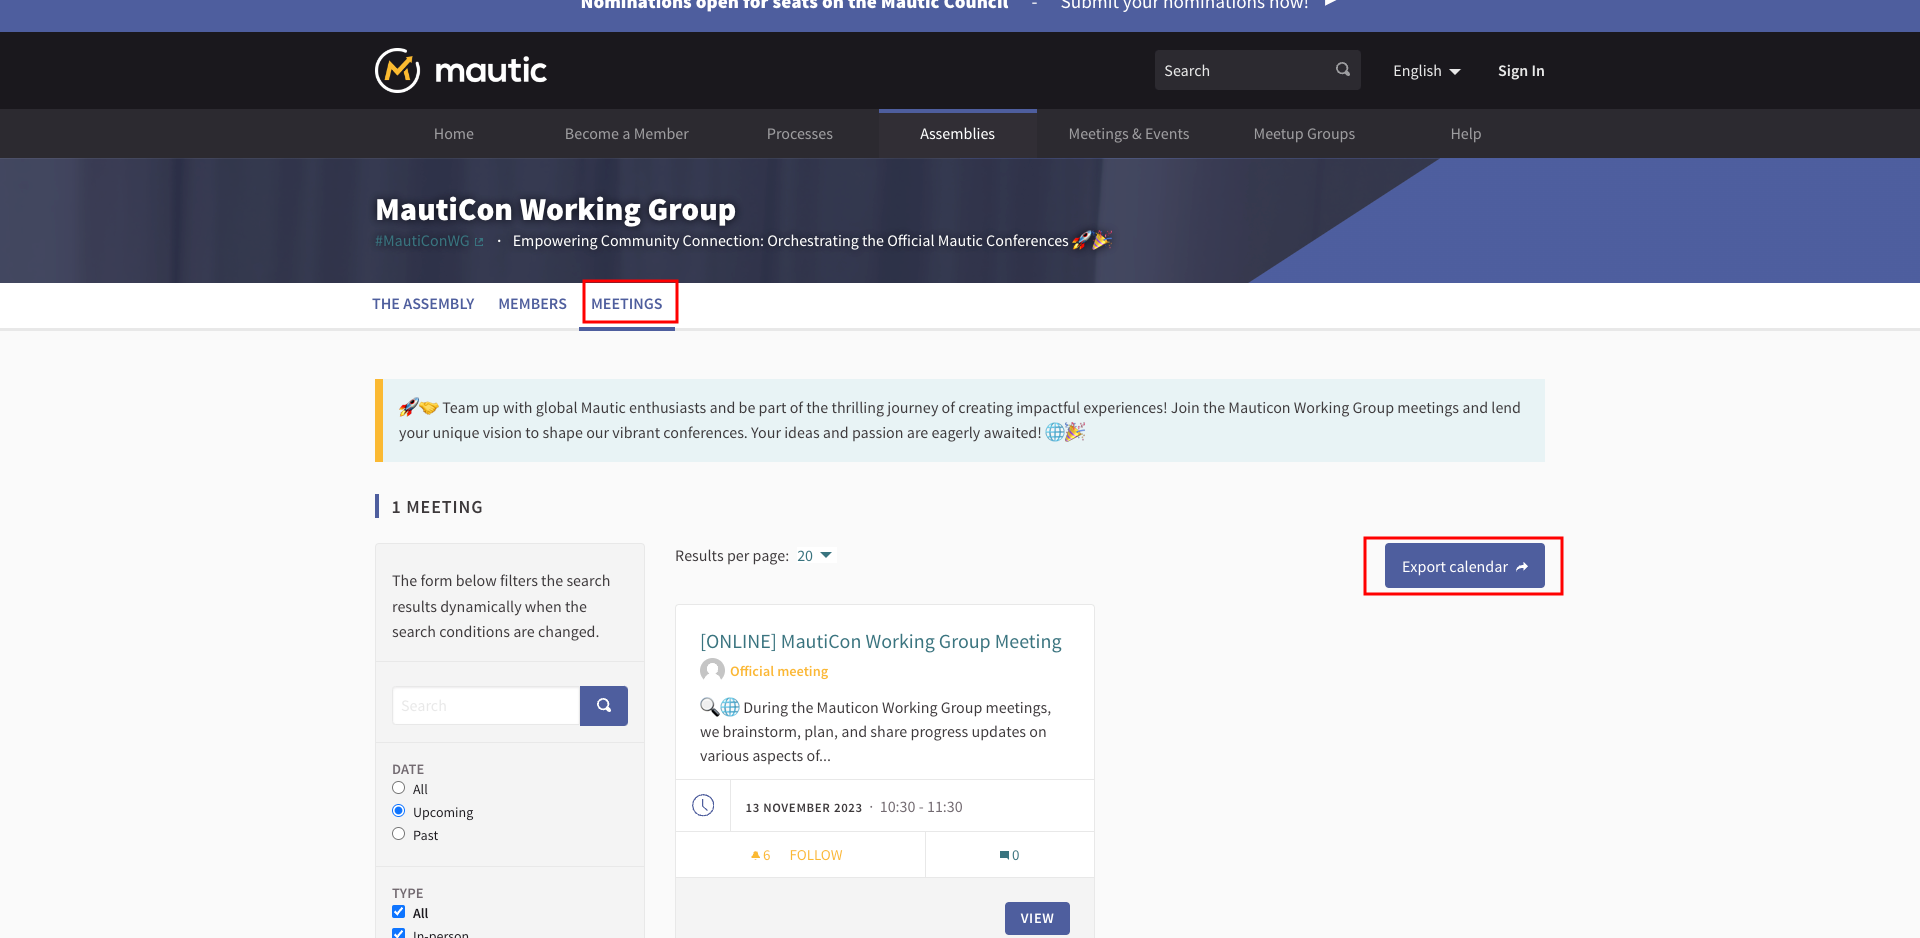
To subscribe to all events site-wide, follow the same process but use the Meetings & Events menu item on the main menu.
Creating a meeting
To create a meeting you need to log in as an administrator.
Go to the administrator panel at Mautic Community Portal and find your assembly
Click on the meetings component
Click new meeting and fill out the form - review the Decidim documentation for guidance on the different form fields.
Ensure that you select the ‘open in a new tab’ option in the embed dropdown when using online meeting links such as Zoom.
Note
It’s not possible at this time to create recurring meetings, but you can very quickly duplicate an existing meeting using the clipboard icon.
Registration
Through registrations, you can have capacity control of the attendance for a meeting. With this feature, for instance, you can limit how many people could attend to the meeting, or you can know before the start of a meeting if you need to find a bigger room to have the meeting.
Enabling this feature adds a button so that participants can express their wish to go to the meeting. Depending on the configuration:
It’s possible to define how many slots are available for controlling the maximum capacity for this meeting
You can configure a custom registration form for asking information from participants
Administrators can make invitations to other participants or people that aren’t registered on the platform
It’s possible to control attendance to the meeting through registration codes - for example, if you want to verify attendees have a valid ticket when they arrive at an event.
When registering to attend a meeting, users have the option to show their attendance publicly, and also whether they’re attending on behalf of another group.

Turning on registrations
To enable registrations for a meeting:
Sign in as an administrator at administrator panel
In the main sidebar, click in the button for the space that you want to configure the component for. For instance, it could be ‘Processes’, ‘Assemblies’, or ‘Conferences’
Click on ‘Meetings’
Search the meeting that you want to enable registrations for
Click on the ‘Edit’ button
Change the ‘Registration type’ field to ‘On this platform’ *
Define how many slots are available in ‘Available slots for this meeting’
Click on the ‘Update’ button
Click on the ‘Registrations’ button
Check the ‘Registrations enabled’ checkbox
Fill the form
The default should be to register attendance through the Community Portal, but if using an external ticketing system, it’s possible to provide a link to the booking page.
Adding a custom registration form
To add a custom registration form, follow these steps in this order:
Open the assembly containing the meeting you wish to use the form with
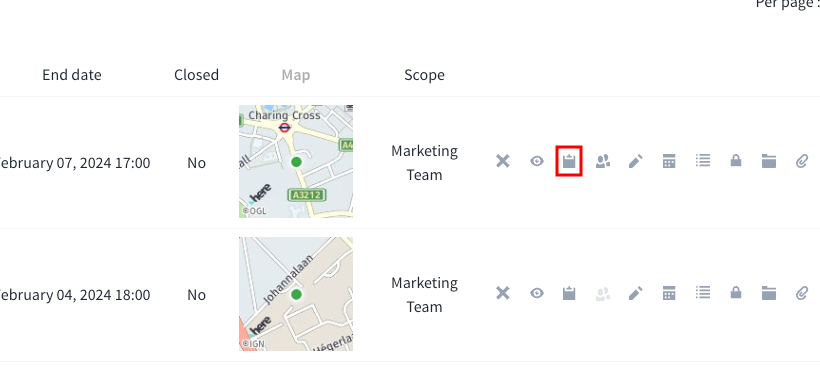
Click on the icon which resembles two people, shown in the list of meetings against the relevant meeting
Check the box ‘Registration form enabled’ and enter something in the Registration terms box - use a ‘.’ if you don’t need to use terms, and click ‘Save’
Open the meeting, click the blue button top right, and write a title, description and terms of service for the form, and click ‘Save’. You must save these first before adding fields, otherwise it won’t work
Open the form settings, and click ‘Add question’ or ‘Add separator’ as required, to build the form. Remember to click ‘Save’ at the bottom of the page.

Etherpad note taking
Instead of using external tools for taking notes, Mautic has an Etherpad instance, which is fully integrated with the community portal. This allows for live note taking embedded within meetings - also allowing people to take part asynchronously - which becomes available 24 hours before the meeting starts, and becomes read only 72 hours after the finish time of the event passes. You must first log in to interact on the pad.
Before the meeting: attendees can review the agenda and add any comments before the meeting starts
During the meeting: attendees can collaboratively take notes
After the meeting: you can add notes, minutes, metadata and/or pictures associated with the meeting when closing the meeting, to provide a record of discussions
The pad appears automatically when logged in within the timelines - you don’t need to do anything.
The pad iframe is accessible for 24 hours before and 72 hours after the meeting. After the meeting, the read only pad displays to logged in users.
Adding an agenda
Please be sure to add an agenda to meetings. It helps people to better understand and prepare for the meeting, and allows you to keep focused when running the meeting.
The agenda feature allows an administrator to define the schedule for a meeting. It’s possible to define agenda items and sub-items, with every one of the topics listed for covering in the meeting, along with a description and the duration of every item and sub-item.
To define an agenda for a meeting:
Sign in as administrator at administrator panel
In the main sidebar, click in the button for the space that you want to configure the component for. For instance, it could be ‘Processes’, ‘Assemblies’, or ‘Conferences’
Click on ‘Meetings’
Search the meeting that you want to add the agenda to
Click on the ‘Agenda’ button
Fill the form
Running a meeting
It’s a good idea to make an announcement on Slack / Social the day before the meeting to remind people, and also an hour before the meeting starts.
Refer to the agenda, and have someone take notes - rotate this person each meeting - on the Etherpad.
Take note of who is in attendance - individuals, companies, groups represented - and if any proposals discussed. Ensure to record the meeting, as appropriate.
Closing a meeting
After a meeting has passed, it’s possible and recommended to close the meeting. This allows you to add the minutes, the notes that gives a summary on the meeting, the agreements reached, decisions made, etc.
This allows you to bring transparency to the meeting and also serves as a record of the different meetings.
It’s also possible to add other kind of metadata to the meeting, such as what organizations have attended, how many attendees and contributions, and the considered proposals.
To close a meeting:
Sign in as an administrator at administrator panel
In the main sidebar, click the button for the space that you want to configure the component for. For instance, it could be ‘Processes’, ‘Assemblies’, or ‘Conferences’
Click ‘Meetings’
Search the meeting that you want to close
Click the ‘Close’ button
Fill the form
Please be sure to provide a link to the meeting recording - upload the recordings to the community shared Mautic Google Drive.
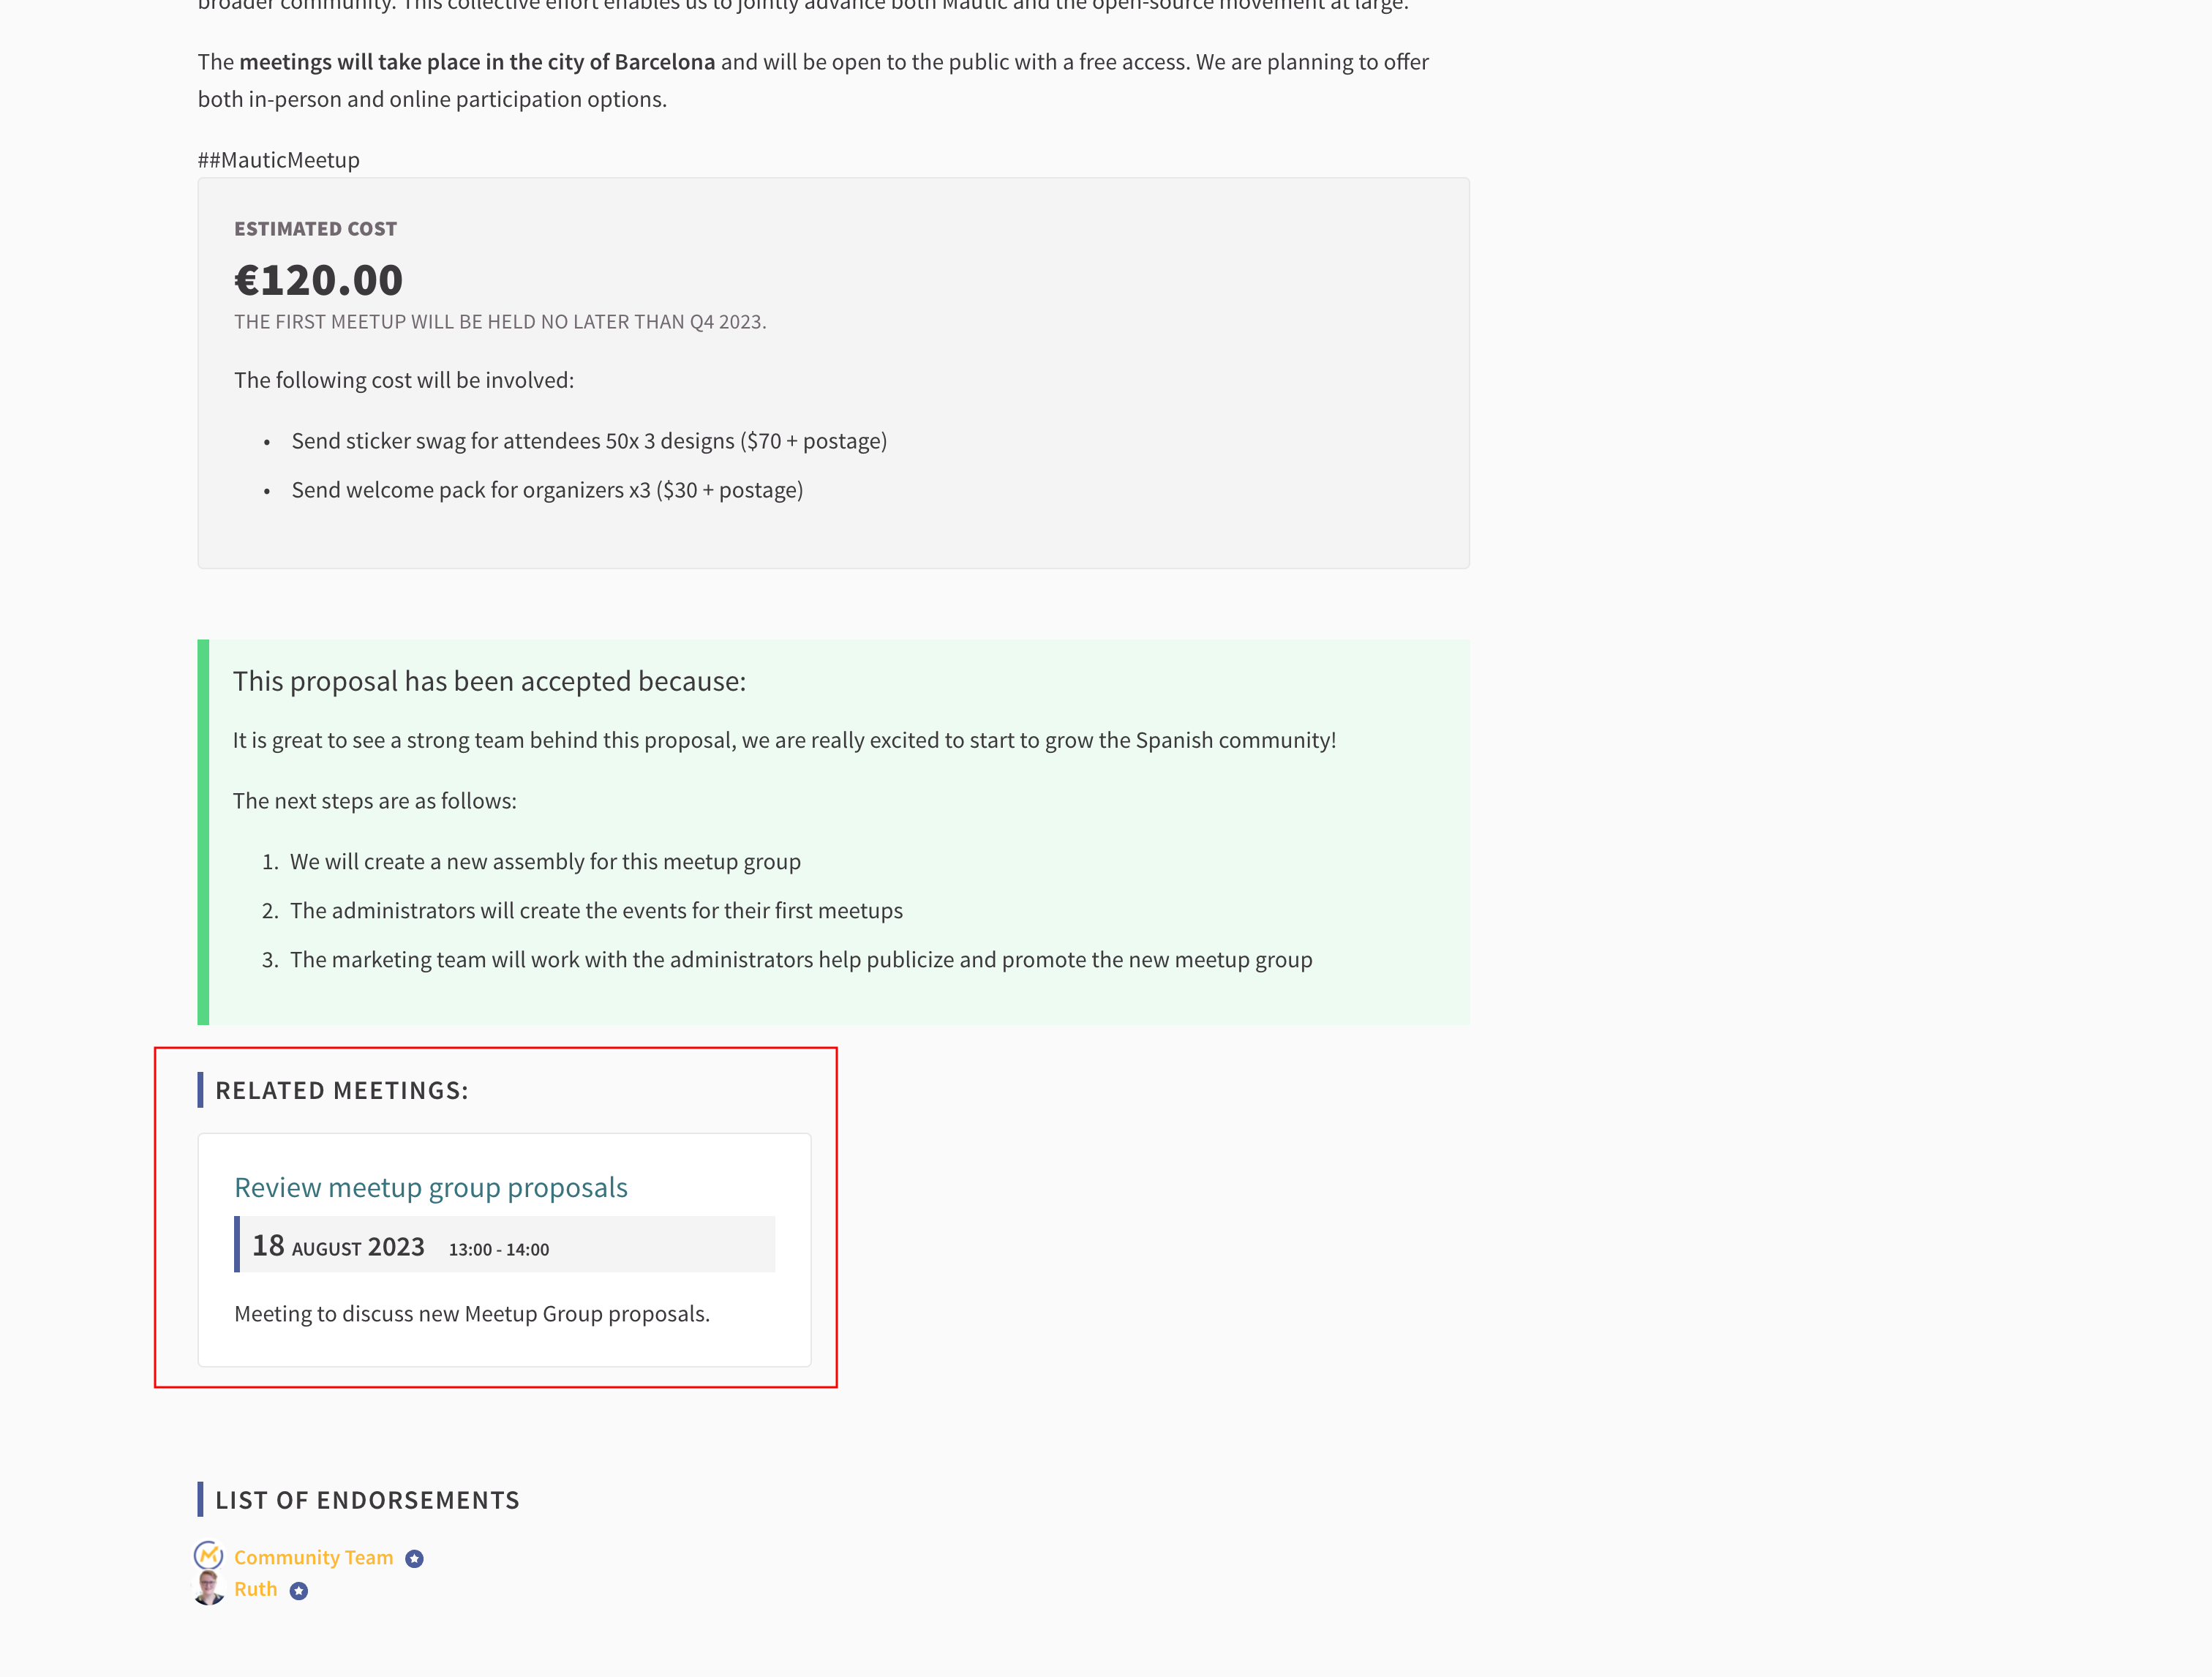
When you associate a proposal with a meeting, it’s also shown in the proposal overview.